Wednesday, September 11, 2013

The "Can You Say 'Bachelor'" Chair


Before
What can I say about this chair?  The wood frame had a terribly ugly stain color that was also peeling off.  The pad for the chair was black.  No.  Faded black.  Really what I like to call "bachelor pad black."  You all know what I'm talking about.  Anyway, my husband LOVED this chair.  He was given this chair which had been sitting in someones garage, he'd had it for who knows how long and it was his favorite place to sit and play video games in his single days.  I'll admit, this thing was comfortable as can be, but it was not coming to our new place looking like that.  We are married and we have a baby; we are adults!  I was not having my place look like a bunch of college guys lived in it.  No.  I had to do something... drastic.  

So, I went to work on this thing.  I started by taking it apart to see what I was working with.  The stain looked like it would come off relatively easily so I got to work sanding the frame.  By hand.  It wasn't until two hours later that I realized I had an orbital sander. Took me another two hours but I got it down to the raw wood.

Raw Wood

Finally, I was ready to stain.  I chose Rustoleum Kona Brown for its rich, dark color.  I put on some gloves, grabbed an old t-shirt and got to staining!  Let me tell ya, staining is actually really fun.  Well at least to me it is!  After about 3 coats of stain, it was finally the color I wanted.  I'd say the entire staining process took about 6 hours which included the in-between drying times. 

First Coat: splotchy and way too light
Second Coat: better but not quite there
Third Coat: PERFECT!

Next up, polyurethane!  I used Cabot Satin Polyurethane and put about two coats on the frame allowing it to dry overnight before applying the second coat.  I took this time to work on sewing the cover for the pad.  And what an adventure that was!  As it turns out, the seat and the pad were two parts, a fact of which I was unaware until I started dismantling the whole thing.  This presented a minor inconvenience because I now had to sew two different pieces which required even more fabric (YAY! <sarcasm).  I ended up with about 3 yards of fabric, which lucky for me was half off at the time.  I believe I ended up spending around $60 on the fabric and thread.
The Fabric!

As I said, I had to sew two different pieces for the chair: one for the frame and one for the pad.  I sewed them like a slipcover so I would be able to change out the fabric later if I wanted.  So, after lots of measuring, cutting, pinning, sewing, checking for fit, re-pinning and re-sewing, I finally had my finished pieces!  The sewing process took up about another 6 hours of my time (mainly because I'm a perfectionist when it comes to these sorts of things and it had to be just right!) but I ended up with a perfect fit.  On a side note, I'm really terrible at working my sewing machine which is probably why it took 6 hours.  I secured the cover to the frame with Velcro (which is annoyingly difficult to do by hand).  The pad was then secured to the frame with an elastic band that I had sewn into the bottom and top seams.  Early in the process (during measuring) I included enough fabric for an flap on the pad cover that would go over the top of the chair to the back onto the frame.  I did this to hide the area where I used velcro to secure the cover onto the frame.  To secure that flap, I used really pretty decorative hooks (see photo).  
It gives it a really nice finishing touch I think.
Flap and hooks

The entire project took about 3 days which I completed over a weekend and cost about $85-$90 with the fabric taking up the bulk of the cost.  The chair now sits happily in our apartment and is still as comfortable as ever!  Needless to say, my hubby is more than happy to have been able to keep his favorite chair!  

The Finished Product!
In case you were wondering, here are the products I used to stain and seal the frame:
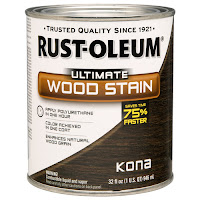
Lowe's Price: $9


Lowe's Price: $12

THE END

Wednesday, September 4, 2013

Why I love DIY

My favorite re-do so far!
Hello Future Readers!

I'd like to begin my story by telling all of you how much I love DIY projects.  Let me count the ways:


  1. I love the Idea of creating something, making something from nothing, bringing new life to forgotten/abandoned pieces.  
  2. I love the Process of finding/imagining projects to do.  The search for my next DIY project is one of the best parts for me.  Its exciting, I get butterflies, and I become totally obsessed with it! 
  3. I love the Effort that goes into re-doing outdated/broken things.  Granted, sanding and painting can be tedious, but knowing that the end result is just a few paint strokes away makes it totally worth it!
  4. I love the Finished Product.  With all of my heart!  My sweat, possibly my blood, and maybe even a few tears along the way went into that piece.  It has certainly earned its place in my home and my everlasting love and devotion.  Well maybe not that last part. 
DIY for me is therapy.  I can lose myself in these projects and just release any frustration or stress I may have through the work.  Its all about the journey and a little about the destination.

Now, regarding referring to myself as a "DI-TRY-er" is my husband's doing.  One day we were talking about a project I wanted to do, and he started to chuckle and said "Now honey, are you sure you're going to do this?" And I replied, "Of course! Why wouldn't I?!" I was very indignant about this. Okay, so I see you're confused.  Let me back up a little bit.  While I love DIY, I'm a bit notorious for starting projects and never finishing them (for whatever reason).  My husband, as he should, knows this about me.  At this point in the conversation, he loving referred to me as a DI-TRY-er and from then on out, I adopted the title with gusto! I may not finish everything in a timely manner, but that doesn't always matter to me.  And I will say that I have made a commitment to myself (and my sweet helper of a husband) to get projects done!  Before we even start one, we give it a timeline and a budget-two thing that are crucial to the success of re-dos and builds. 

So, that's my story.  This blog will be my documentation of the continuation of that story.  I'll be posting projects (big and small), my how-to's, my mess-ups, and other DIY related things.  Enjoy!